
Decisions, decisions … Adobe Lightroom
A couple of U3A members have expressed an interest in purchasing Lightroom. It’s a confusing time in the Adobe world at the moment and the window for purchasing a stand-alone desktop version of the software (Version 6) is possibly closing, possibly … I don’t know!!
Adobe wants its users to move on to a Subscription-based Photography Plan which includes access and use of Photoshop as well as Lightroom, or alternatively a new Lightroom Creative Cloud Plan that is cloud-based with loads of cloud-storage and access to just Lightroom.
I decided to join the original plan about two years ago, and I hadn’t regretted it (until recently), but it does involve an ongoing commitment of c.£10.10 (currently) per month to allow you to keep editing your photos. If you cancel your subscription you can still access them, but the main editing functions are disabled. On the plus side you are provided with all the updates and new versions of the software whilst you still pay your subscription. As it was the main piece of photo software I used – it was a no-brainer for me back in 2015.
When I moved from Lightroom v.5 back in 2015, I opted for the Adobe Photography (20Gb) Plan Creative Cloud subscription. This is obtained from this link.
However beware. Adobe are pushing the cloud based service, rather than Lightroom as a desktop application, and are confusingly using the name of the old subscription Desktop application – Lightroom CC – to describe the mobile-world, cloud-based version which they are trying to push to the consumer market.
The desktop application is however ALSO part of the Photography Plan and IN MY HUMBLE OPINION this is the one you should be installing if you opt for the Photography Plan. It’s NOW called Lightroom Classic CC. This is the version that I upgraded to in the New Year – you could call it Lightroom 7.
However, as I said at the top of the message; if you just want a standalone, one-off purchase of Lightroom v.6 with a CD, it’s still available from Amazon for instance (also John Lewis, Curry’s and PC World I believe), or from Adobe direct.
Installing the standalone version from Adobe is relatively straightforward. You need to create an AdobeID as part of the process, and then you get a Licence Key. If you want to save c.£6 and NOT have the CD you can get it as a download to install the software – see the links from the Amazon page to get the “ xxx Activation code by email” version.
If you have an earlier version of Lightroom (e.g. v 4 & 5) you can upgrade it from this link and save yourself about 50% on the purchase price of Lightroom v.6, and if you’ve installed the Lightroom CC trial here’s a link if you want to change to Lightroom v.6.
Now this is important. Lightroom v.6 will not be upgraded in the future. It is not straightforward to go back to Lightroom 6 from Lightroom Classic CC (v.7) without losing some of the information you’ve applied with that later version. However for the amateur photographer there is plenty in Lightroom 6 and unless you’re thinking of buying some very expensive camera bodies and lenses in the future you probably won’t suffer from just using Lightroom v.6.
Installation assistance for Lightroom 6 is provided here.
If you decide to go down the Creative Cloud subscription route (as I did initially), you should be careful during the installation process, and you may find it useful to follow the assistance provided in this link.
If you want to ask me any questions before making a decision, don’t hesitate to do so, it will be my pleasure to try and answer them. If I can’t answer the question I will point you to a link which I think will answer the question.
So what is my recommendation? This matter has taken up a lot of my time just recently and I’ve agonised over the decision I should make. You can read about my reasoning and the decision I eventually made to probably stay with Lightroom v.6 whilst trying out Lightroom Classic in this blogpost.
Sharing an image (or album) from Google Photos

To finish off this series of posts on using Google Photos, this post complements the email that I sent out to the Cardiff U3A Computer Group which encouraged them to do some “homework” and share a photo stored in Google Photos with me.
This post uses a couple of photos which I took this week of some toadstools that had appeared in our garden after the heavy rains we’ve had this month and which Jenny was worried might be Honey Fungus. I took them to achieve an identification – which I hope I’ve got right!
From my Google Photos desktop I can see this …

… I need to select Create, then Album and click on the photos I want to put in the Album …

… and click on Create and give the Album a name …

… in this case I’m calling the album “Common Inkcap” and then click on the Tick in the top left-hand corner of the screen.
Now I can Share the album using the Share icon in the top right-hand corner of the screen, and clicking on Get link …
icon in the top right-hand corner of the screen, and clicking on Get link …
… and after clicking on COPY I can email the link to the album to anyone, or if you’re a Google+, Facebook or Twitter user I can share a link to any of those social media sites.
At another time, you can change the Sharing options from the More options  menu in the top right hand corner of the screen …

… and click on the slider to let others if they have the link to see the album, and you’ll see a screen like this …

… and you can choose how others will interact with your album, but that’s for another day.
In case you’re interested here’s a link to the album
More Google Photos – some simple image manipulation

Following up from my earlier post which covered uploading images from your mobile device, or camera, to Google Photos; this post picks up from the point where the images have been uploaded and gives you an idea of what simple editing you can do to your photos. This Google article with separate tabs to follow for Computer (browser-based), Android and iOS (iPhone/iPad) sets out the scope of the things that you can do. For this post I’m only looking at what you can do on a Computer, from your browser.
What I’m going to do is to take the “featured” image from the earlier post and show a few screenshots of things that I have done to it, perhaps to improve it – although that might be rather difficult as it’s a rather boring subject. So here’s the original photo (unedited), taken with my Sony NEX-6 camera and stored onto its SD-card and then uploaded into Google Photos, using the SD-card reader on my computer.

Let’s crop it a bit to get rid of the spade handle. First I double-clicked on the image in my Google Photos pictures at https://photos.google.com and this menu appeared …

The first icon to Edit the Image, the third to Enlarge (or Zoom) the Image, the fourth to get Info on the Image, the fifth to Delete the Image and the sixth
gives you More Options. I clicked on
to Edit the Image.
Another window opens to show you this …

… you’re being offered a range of filters 
icon to Crop and Rotate.

On this screen, the first icon allows you to select the Aspect ratio of the image you want (as shown above). Selecting one of these will apply an automatic crop. The second icon allows you to Rotate the Image. You can then drag the corners or edges of the image now to crop to exactly the form of the image that you want to keep. The third icon allows you to Reset your edits to start again, and Done is clicked when you’ve finished editing. So in this case, I want to keep the Original aspect ratio and just get rid of the spade handle manually …

… so I drag up from the bottom right-hand corner, and down from the top left-hand corner to get the cropped window on the image above. I can move the crop window around the image by clicking and dragging on it until I have it just the way I want it. I could also finely rotate the image if I thought I’d not got it completely straight by clicking and dragging on the slider on the right-hand side of the image. So, having done this, I have an image I want to work with so I click on Done and I get returned to the Edit window …

… you can see I have the choice of changing the Light, Colour and Pop (sharpness) of the image. By adjusting these sliders I could arrive at something like this …

… but even finer changes can be made by clicking on the arrow against each of these elements and adjusting individual components, so I could end up with changing the Light a little and adding a Vignette to the corners with some Warmth from the Colour slider to give me this …

Now I know I’m biased, but I think that this almost becomes a reasonable picture. All you need to do is to select Save Copy from the More Options menu, return to the Photos by pressing on the Return arrow in the top left-hand corner of the screen and you can see the new processed image next to the original.

What do you think?
Protected: Digital Music
A replacement for iTunes?

This post starts from this paragraph in an earlier post on my personal blog …
“How might I integrate my digital music in a better way than I was currently doing it via the Apple TV, and iTunes on the MacMini? The answer … a Sonos Connect system with RCA output to the Marantz amp connected to the iTunes Media folder and a copy of the iTunes Library hosted on a USB-3 disk connected to an AirPort Extreme router. [The master iTunes Library is shared (using Dropbox) around the other 3 Macs in the house – a brilliant solution to avoid maintaining different iTunes Libraries.] I can now listen to the digital music in all three rooms. Of course, now I have a Sonos Connect, I can stream to other Sonos Play speakers … but that’s for another day, which may actually come sooner rather than later.”
… which formed the subject of my discussion with the Cardiff U3A Digital Group on the 4th January. But I digress … what is the problem with iTunes?
iTunes was introduced shortly after the first iPods as the way/means by which you could store/search for your music on your brand-new revolutionary personal digital music device. And there you have the problem almost defined in a nutshell. It was “enhanced” to add other media to it – video, TV, film, podcasts; and you could synchronise your device to a computer so that the database work could be done on a more friendly device; and with the introduction of the iTunes Store – the focus has switched to selling music and storing it in Apple’s iCloud. But it’s huge problem is that it’s old, and it’s personal – tied and linked to single portable devices. You have more than one device – you have to synchronise them separately unless you rely on playing from iCloud – and the options here are very confusing; you have more than one playlist – you have to copy them to different devices; you want to have all your media in one place – you have to make sure you have your iTunes settings correct otherwise you’ll never know where the media your playing is actually stored.
So the link in the quote above provides an ingenious solution if you want to create a shared iTunes Library when you have more than one device you want to reference a single iTunes Library from. It really does work, and I’ve used this solution for a few words, and until recently I had little trouble from using this method, using my MacMini as the main computer for doing the sync’ing with my iPhone etc. However, after that episode I began to think there must be a better way.
I really didn’t want to use Spotify because that would only serve me music, and in any case most of the music I wanted to listen to, I already had and had transferred from CD to digital.
I researched whether I needed to buy more hardware, decided I didn’t, and opted to install Plex on my MacMini, with the media stored on an external USB-Disk. Doing this meant that I could continue using iTunes as well as the Plex Media Server as it looks at the same disk and media folders. And the advantages?
Well the most remarkable is that after purchasing a Plex Pass (the server itself is free) I can access any of my purchased and stored media – films, videos, music, photographs – from anywhere – wherever I am, on any device I have installed the Plex player app – including my Apple TV. It can operate over wired, WiFi and cell connections (if enabled). Isn’t that amazing? Plex is also moving towards streaming its own, or licenced content and offering a LiveTV service. Please read the Wikipedia article for more information.
It really is very easy to setup!
Google Photos – how I use it
As promised, and apologies for the delay – Christmas and illness got in the way – here are some notes on how I’ve got Google Photos to work for me. It concentrates mainly on how I’ve configured Backup and sync to do what I want it to do. I think the editing of photos is relatively straightforward, as is creating albums and slideshows. I may get round to doing something on the latter, as I might with sending photos for printing – that’s quite a good topic. I’ve used Snapfish and Yophoto for printing photos and books, both of which I can recommend. I now use Blurb, but that’s because it works so well with Lightroom – it’s more expensive than the other two.
Some more links, if you’re interested …
25 tricks to master Google Photos – https://www.pcmag.com/feature/345998/25-tricks-to-master-google-photos
How to master Google Photos – https://www.theverge.com/2017/6/9/15762170/google-photos-how-to-master
32 tips and tricks for Google Photos – https://www.computerworld.com/article/3148245/desktop-apps/32-tips-and-tricks-for-google-photos.html
Getting to grips with Google Photos
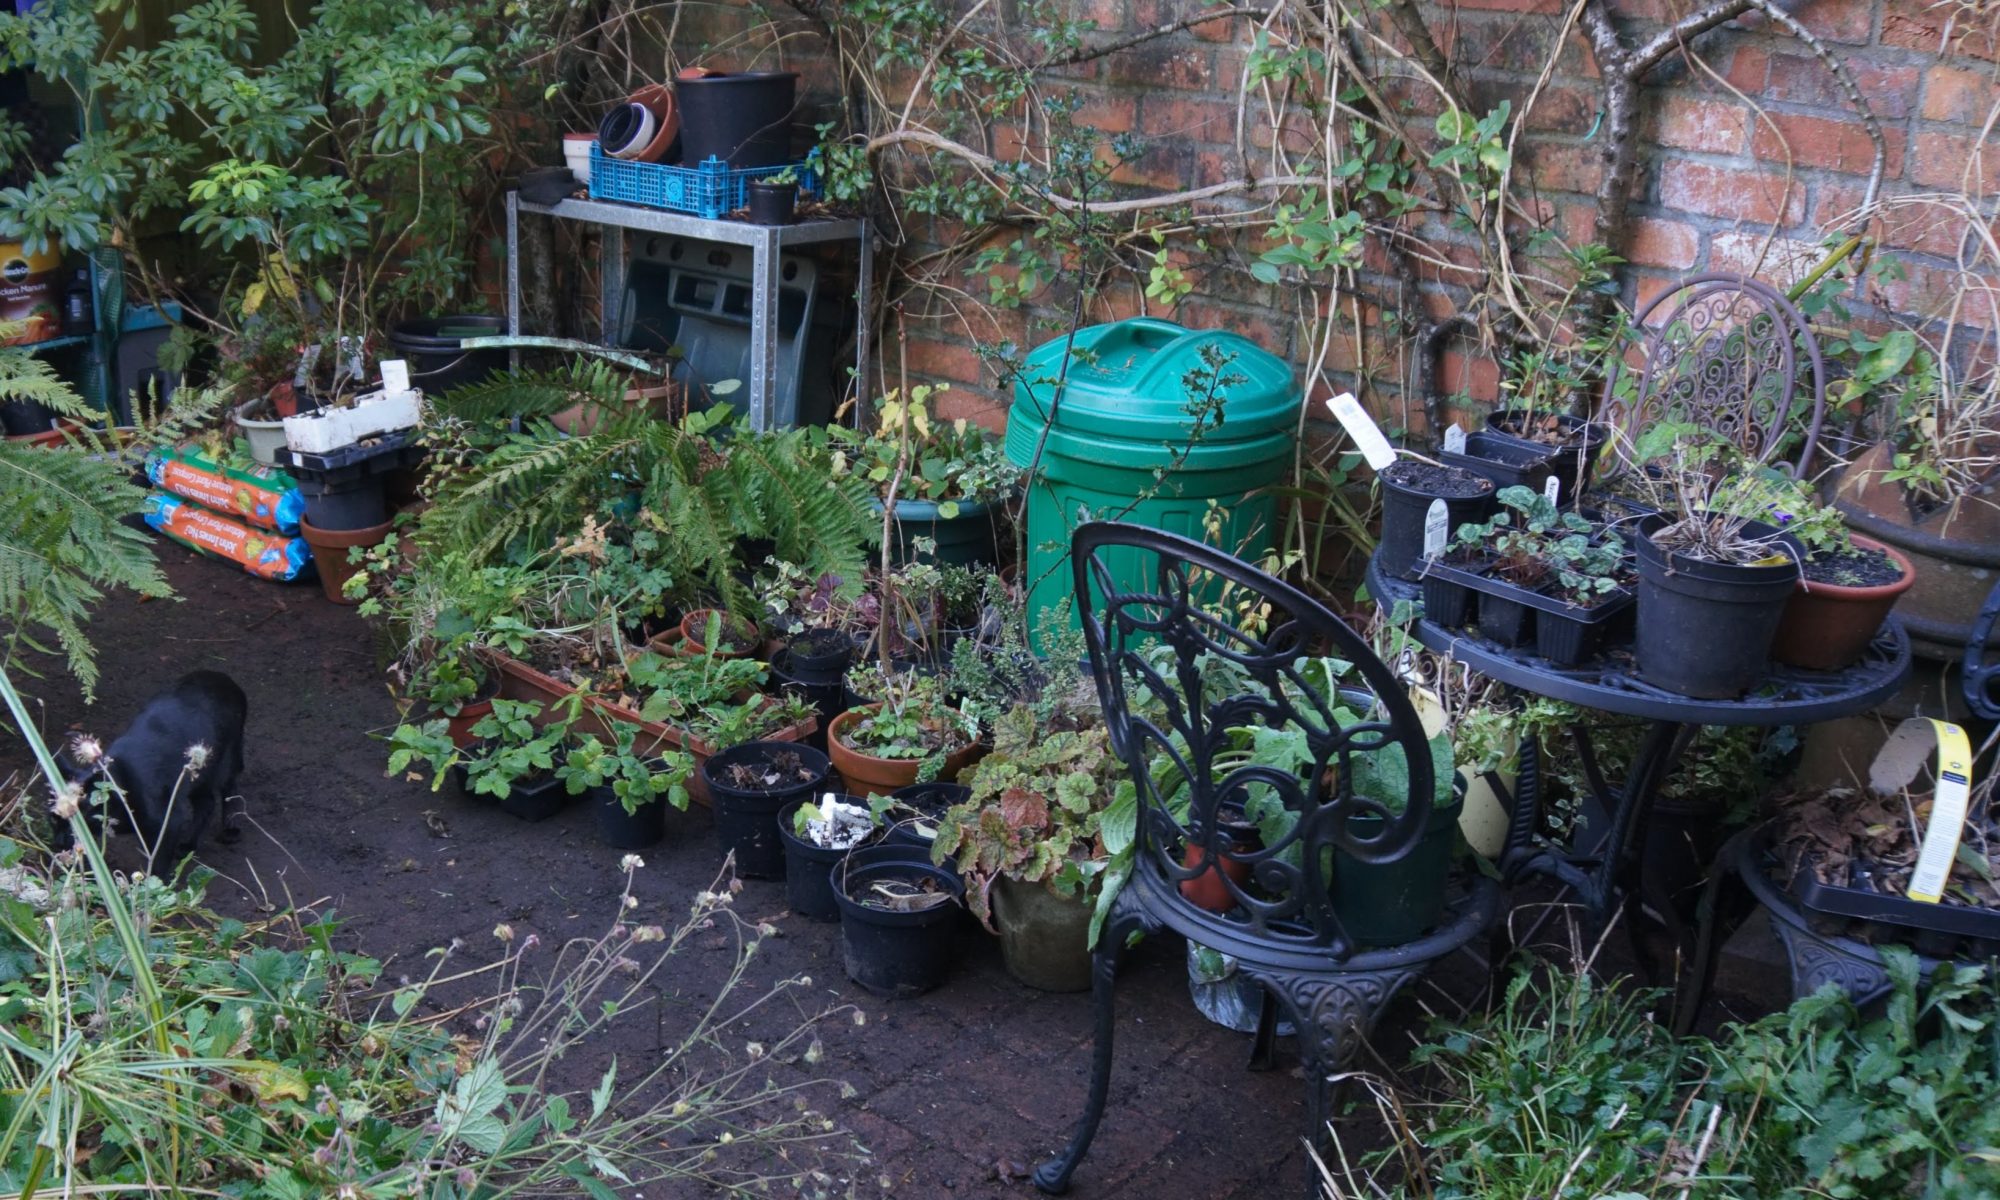
It really is rather surprising that given the widespread adoption and use of Google Photos, that I can not find a sensible, easy to read, introductory guide on how to use it. Perhaps it’s because it’s so easy to use? Well, it is – up to a point. That point being how it works alongside Google’s other cloud-based software, ie Google Drive and Backup and Sync, and the now defunct and disconnected Picasaweb – where your photos are still accessible in your Google Archive.
So this note is an attempt to set out what you can do with Google Photos using images obtained on your phone or tablet, or uploaded from your camera’s SD card. It will principally work from the principle that you’ve taken the photos, you want to upload them to your laptop or desktop (PC or Mac) and then want to work on them there using a web browser. That is not an essential workflow, you can do everything on your mobile device – if that’s where the photos are, even down to editing the photos using Google’s Snapseed application for iOS, or Android devices, it’s just the approach I’ve taken here. So if you want to do everything on your iPhone/iPad or Android device you can learn how to use Snapseed on iOS here, I believe the application is nearly the same on Android.
To avoid duplication of effort however, here is an article that you should read first. It covers nearly all the features of the device apps, and the web browser version, and in particular handles some of the editing functions available, but it doesn’t cover the intricacies and peculiarities of the Backup and Sync tool.
So … how do you get photos into Google Photos? This Google article tries to explain how you can use Backup and Sync to do that. How does Google Photos work with Google Drive? This Google article attempts to explain how. Confused, I thought you would be! This is what I’ve done, why I’ve done it and perhaps most importantly how I do it!
Sometimes, it’s best to work backwards from Google’s most recent announcement because in doing that you can be reasonably sure you’ll be moving in the right direction … forwards! Google has separated Photos from Drive and is encouraging users to deal with them separately. It’s a continuation of the separation which started when Photos was spun out of Google+.
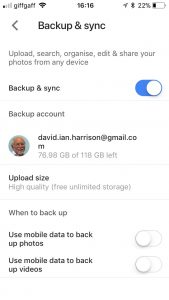 So how do I get my photos into Google Photos? From the iPhone/iPad (or any other smartphone that has the Google Photos app) it’s quite straightforward.
From the menu icon, choose Settings, enable Backup & sync and then make decisions as to the quality of the images, and when they’ll be backed up (uploaded). I have opted to use the High Resolution storage option, and for them only to be uploaded when connected to a WiFi network. The reasons for this are that my main photo software is Lightroom and I have a different method of working with that. What I want to use Google Photos for is essentially sharing albums with family and friends.
 From my desktop/laptop it’s almost as straightforward. I connect the camera by USB cable to the computer, or insert the SD card from the camera into the SD card reader in the computer and I will be prompted with this message …
They should then get uploaded to Google Photos and the images can be seen in my Google Drive as an entry under USB Devices & SD cards, from which I could copy them to a folder on my Google Drive – I don’t recommend you do this.
So there you have it. I’ve disentangled Google Photos from Google Drive; I’ve used Backup and Sync to upload photos to Google Photos and I’m now ready to edit photos, create albums and share images through Google Photos.
Finally … if you were a user of Picasa and Picasaweb, your photos are still accessible. What you can, and cannot do with them is recorded in this Google Help document. You can still download and use the PC or Mac Picasa desktop client for editing your pictures and if you want a simple photo-editing tool to get started with as long as you’re using a 32-bit operating system (ie not Apple’s Catalina or later), it’s a good place to start, but, it is no longer linked to Google Photos (or Picasaweb). However, there is a workaround!
When you save an image that you’ve edited in Picasa, you can save it to a folder that will then be automatically scanned by Backup and Sync and thus uploaded to Google Photos.
[NB Only those who attended my two sessions on Google Photos will actually understand why I included the really uninteresting image at the top of this post – I’ll leave the rest of you to ponder on what could possibly be the reason 🙂 ]
Protected: Google Goggles
Meltdown and Spectre: How chip hacks work
I was unable to explain that well how these vulnerabilities in the Intel chips was being exploited. On the plus side I didn’t say anything that was incorrect, but here’s a reasonably readable description of the problem and it’s implications to us all.